Answer these simple questions and we will find you the BEST prices
Which type of solar quotes do you need?
It only takes 30 seconds
100% free with no obligation

Get Free quotes from loft conversion specialists near you

Save money by comparing quotes and choosing the most competitive offer

The service is 100% free and with no obligation
Loft Conversion Process: Step by Step Guide


- First, ensure that your loft is suitable for conversion by assessing the ceiling height, roof structure, and access points.
- Whether planning permission is needed or not, you must follow building regulations.
- A well-executed loft conversion can boost property value by up to 20%, making proper planning essential.
Thinking about a loft conversion but not sure where to begin? You're not alone. Taking on such a project can feel daunting, but with the right guidance, it doesn't have to be.
In this step-by-step guide, we’ll walk you through the entire process—from checking if your loft is suitable to navigating building regulations and final inspections. Along the way, you’ll get practical tips on budgeting, working with professionals, and handling any challenges in loft conversion from start to finish. Let’s dive in!
Ready to begin your loft conversion? Don’t waste hours contacting loft conversion installers on your own. Simply fill out our 30-second form, and we’ll do the rest.
We’ll connect you with up to 3 trusted installers near you for free no-obligation quotes. Click below to get started!
- Describe your needs
- Get free quotes
- Choose the best offer
It only takes 30 seconds


What is the process of a loft conversion?
A loft conversion is an excellent way to increase your home's living space and value, but it requires careful planning and execution. Here’s a step-by-step guide to help you understand the loft conversion process.
1. Assess feasibility
Before diving into a loft conversion in the UK, you need to check if your loft is suitable for conversion. This is the stage where you can determine if it is worth doing a loft conversion for your home.
Key factors to consider include:
- Height: The minimum ceiling height should be 2.2 metres. Measure from the floor joists to the roof ridge.
- Structure: The condition of your roof and support beams needs to be strong enough to accommodate the changes. A structural engineer’s inspection is crucial at this stage.
2. Get planning permission (if necessary)

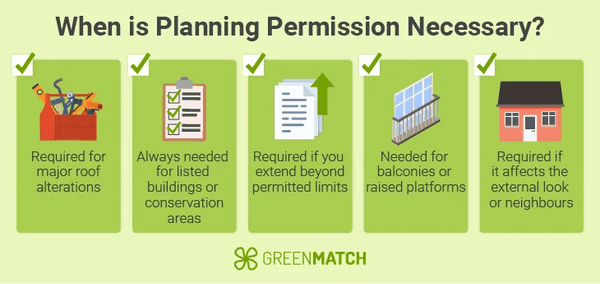
Not all loft conversions require planning permission, but if you’re changing the roof structure (such as adding dormer windows or increasing roof height), you’ll need approval from your local authority.
Even for permitted developments, it’s essential to check if your project complies with regulations regarding height, external appearance, and structural changes.
3. Hire a designer or architect
To create a detailed plan, you’ll need architectural drawings that outline your vision. These will not only guide the construction but are also necessary for applying for building regulations approval.
A professional designer can also help you explore layout options, such as maximising light and space.
4. Obtain building regulations approval
Regardless of whether planning permission is required, your loft conversion must comply with UK building regulations. This ensures your new space is structurally sound and meets safety standards, such as fire resistance, proper insulation, ventilation, and escape routes.
A building control officer will need to inspect the work at various loft conversion stages. Here are the typical loft conversion inspection stages for an average project:
- Initial inspection: Before any work begins, a building control officer will visit the site to review the plans and check that everything is compliant with regulations. This is often done after you’ve applied for building regulations approval.
- Structural inspection: After structural work begins, an inspection will be conducted to ensure that essential reinforcements, such as steel beams and joists, are correctly installed and that the building is able to safely bear the additional weight.
- Floor joist and roof structure inspection: This stage involves checking the new floor joists and any roof modifications to ensure they are installed according to the plans and meet safety standards.
- Insulation inspection: Once insulation has been added, the inspector will check that it meets the required standards for energy efficiency and fire safety, ensuring proper insulation in walls, floors, and ceilings.
- Fire safety inspection: This inspection looks at fire safety measures, such as smoke alarms, escape routes, fire doors, and whether the materials used meet fire resistance standards.
- Final inspection: After all the work is complete, a final inspection is carried out to check that everything complies with building regulations. This includes checking windows, electrics, plumbing, and overall structural integrity.
Upon passing all inspections, you’ll receive a building regulations completion certificate, confirming that your loft conversion meets all the necessary standards.
5. Budgeting and financing
You’ll need a detailed budget that accounts for materials, labour, planning fees, and contingencies.
Don’t forget to budget for unexpected costs—experts suggest setting aside an additional 15–20%. If you’re financing the project, secure this before construction starts.
6. Prepare the space
Clear the loft area and remove any obstacles to make space for construction work. If you have a water tank or chimney breast in your loft, these may need to be relocated or removed, which can affect both cost and project duration.
7. Structural changes
Once the space is cleared, work begins on reinforcing the structure. This might involve:
- Installing steel beams for extra support
- Raising the floor to accommodate insulation
- Strengthening the roof rafters, if necessary
This stage ensures that your home can handle the added weight and changes to its structure.
Incorrectly reinforcing your home’s structure can lead to serious issues, such as inadequate load-bearing capacity, which can cause long-term damage like cracks or structural failure. That’s why it’s essential to consult an expert at this stage.
An architect or structural engineer ensures that all support beams, roof rafters, and joists are correctly installed, meeting both safety standards and building regulations. They also have the expertise to assess hidden factors, like whether your existing roof or floor needs additional reinforcement.
By working with a professional, you avoid costly mistakes and ensure your loft is built to last.
Comparing loft conversion contractors can take hours and be very stressful when done alone. Fortunately, we can connect you with up to 3 approved installers near you for free! Just fill in our 30-second form, and we’ll do the rest. Click below to begin!
- Describe your needs
- Get free quotes
- Choose the best offer
It only takes 30 seconds


8. Installing windows and dormers
If your design includes windows or dormers, these will be installed next. Choosing the right windows is key to maximising light, ventilation, and comfort in your loft conversion.
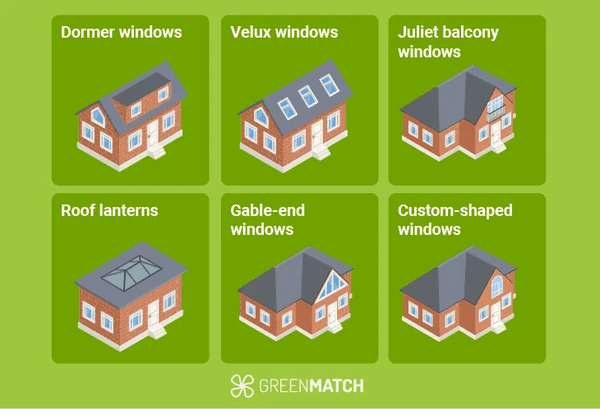
Here’s a breakdown of common options:

- Dormer windows: Dormers extend outward from the roof, creating extra headroom and floor space.
- Velux windows: They are installed directly into the roof without structural changes.
- Juliet balcony windows: Floor-to-ceiling windows with a safety railing, providing an open-air feel and lots of natural light.
- Roof lanterns: Ideal for flat roof conversions, roof lanterns flood the space with light and create an airy atmosphere.
- Gable-end windows: Large, dramatic windows installed on the vertical gable wall, perfect for maximising light and views.
- Custom-shaped windows: For unique loft designs, custom windows can enhance the space while adding character.
9. Plumbing, electrical, and insulation installation
During this stage, pipes and wiring are installed if you’re adding a bathroom or lighting. Proper insulation is also added to ensure the space meets energy efficiency standards and keeps the new room comfortable in all seasons.
10. Flooring and wall construction
Once the plumbing and electrics are installed, the next step is to build the flooring and walls. This is when the room really starts to take shape, giving you a clearer idea of how the finished space will look.
For the flooring, new floor joists are added to support the weight of the room. It’s important to choose strong, long-lasting materials to make sure the floor can handle furniture and people. Adding insulation between the joists will help keep the loft warm and energy-efficient.
Soundproofing is important, too. You can add soundproof materials between the new floor and the ceiling below to reduce noise, which is especially useful if the loft will be used as a bedroom or office.
For the walls, stud partitions (either wooden or metal) are used to divide the space. These walls are then covered with plasterboard, ready for painting or decorating.
If your loft will have separate rooms or a bathroom, this is the stage where those walls are built. You can also add insulation inside the walls to help with temperature control and reduce noise.
11. Plastering and finishing
With the major construction complete, the walls are plastered, and any final details, like fitting doors, skirting boards, and windowsills, are done. Decorating can begin once the plaster has dried.
12. Final inspection and certification
Before the space can officially be used, the building control officer will conduct a final inspection to ensure that all work complies with building regulations. Once the inspection is passed, you’ll receive a completion certificate, which is essential if you plan to sell your home in the future.
Hire an expert to guide you through the loft conversion process
A loft conversion is a big project, and having the right professionals on board is essential to ensure everything goes smoothly. They’ll help you navigate complicated planning permissions, meet building regulations, and ensure your conversion complies with safety standards.
With expert guidance, you can avoid costly mistakes and feel confident that your project is in safe hands from beginning to end. Here’s how you benefit from working with different specialists from the very start:

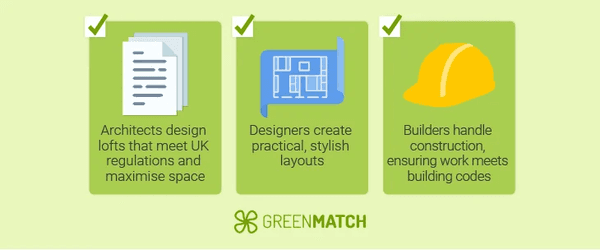
- Architects: An architect will help design a functional and beautiful space, making the most of your loft while ensuring it complies with UK regulations. They also provide loft conversion advice on optimising natural light, improving energy efficiency, and meeting structural needs.
- Designers: Interior designers bring your vision to life by creating a practical and stylish layout. They focus on details like furniture placement, lighting, and materials, making the space both functional and visually appealing.
- Builders: Builders ensure that the work is completed to a high standard. They handle structural reinforcements, installations, and finishing details while following approved plans and building codes. Skilled builders help prevent costly mistakes and delays.
Based on how much value does a loft conversion add, you may consider it a very good investment, as it can increase your home’s value by up to 20%.
However, to truly maximise this return, it’s essential to have a solid cost strategy and careful planning. A crucial part of this planning is gathering multiple quotes from contractors.
Before committing to any contractor, it’s always wise to gather multiple quotes. This gives you a clear idea of the costs involved and allows you to compare services to find the best fit for your project and budget. Be wary of quotes that seem too good to be true—they often are.
Take the next step by getting up to 3 no-obligation quotes from trusted local installers. Simply fill in a 30-second form, compare your options, and choose the best expert for your needs. Click below to begin!
- Describe your needs
- Get free quotes
- Choose the best offer
It only takes 30 seconds


FAQ
The first step is assessing whether your loft is suitable for conversion by checking height, roof structure, and overall feasibility. Consulting with an architect or structural engineer is essential at this stage.
The process involves assessing feasibility, securing any necessary planning permission, designing the layout, obtaining building regulations approval, completing structural work, installing utilities, and finishing with flooring and walls.

Tania is an experienced writer who is passionate about addressing environmental issues through her work. Her writing aims to shed light on critical environmental challenges and advocate for sustainable solutions.
We strive to connect our customers with the right product and supplier. Would you like to be part of GreenMatch?

