Answer these simple questions and we will find you the BEST prices
Which type of solar quotes do you need?
It only takes 30 seconds
100% free with no obligation

Get Free quotes from insulation specialists near you

Save money by comparing quotes and choosing the most competitive offer

The service is 100% free and with no obligation
- GreenMatch
- Insulation
- Shed Insulation
Shed Insulation: How to Insulate a Shed

- 9.6 million UK homes have sheds, but most remain uninsulated, reducing their effectiveness and exposing them to potential damage over time.
- Proper insulation can significantly extend a shed's lifespan and make it more functional, regulating temperature, reducing dampness, and protecting stored items.
- Shed insulation can cost between £670 to £1,600 depending on the size of your shed, the materials you choose and if you opt for professional installation.
The garden shed has become a quintessential symbol of British pride and identity, serving various purposes such as storage, workshops, playrooms, and lounge areas. It holds a special place in many UK households, with an estimated 9.6 million homes featuring a shed and 52% of the population owning one, according to Asgard.
Sheds free up space, add value, and protect tools, but many in the UK lack insulation, leading to damage over time. Adding insulation helps regulate temperature, prevent dampness, and protect contents from weather. Whether used as a workshop, office, or storage, insulation makes it more comfortable and durable.
In this guide, we’ll cover everything you need to know about shed insulation – from choosing the best materials and understanding the costs to weighing the pros and cons – so you can make your shed an even more valuable asset.
Ready to insulate your shed? Working with a specialist ensures you get the right solution for your needs and budget. Finding one can be time-consuming, but GreenMatch makes it easy. We connect you with up to four free quotes from top insulation experts in your area. Fill out our 30-second form to get started. Click below to learn more.
- Describe your needs
- Get free quotes
- Choose the best offer
It only takes 30 seconds


Why insulate your shed?

Shed insulation offers numerous benefits that enhance its functionality and lifespan, making it a more versatile and valuable space. Sheds in the UK serve various purposes, from storage and home offices to playrooms, art studios, and even housing for small pets. No matter how you use your shed, proper insulation can protect your belongings and make the space more comfortable. Here’s why shed insulation is essential:
- Temperature regulation: Insulation helps maintain a stable internal temperature, keeping the shed warm in winter and cool in summer. This makes the space comfortable for year-round use. It protects sensitive items like electronics, paints, or pottery from extreme temperatures that could cause damage, extending their lifespan.
- Moisture control: Sheds are prone to moisture buildup, especially when the roof becomes colder than the interior. Condensation occurs when warm air meets a cold surface, leading to potential water damage. Insulation helps regulate temperature, reducing condensation and minimising moisture problems. This also makes running electrical power to your shed safer and easier if needed.
- Extended shed lifespan: Proper insulation protects the shed from rot, mould, and structural damage by reducing moisture and temperature fluctuations. According to Effortless Shed, the average lifespan of a wooden shed is 8 to 10 years. Still, insulation can significantly extend this, ensuring your shed stays in top condition for longer.
- Increased functionality: An insulated shed is far more versatile and comfortable, regardless of weather conditions, allowing you to transform it into a workshop, studio, or any other space.
Additionally, you can insulate specific areas like walls, roofs, or floors, focusing only on problem areas to save on costs. This flexibility ensures you insulate efficiently, addressing critical issues while saving time and money.
How to insulate a shed
Shed insulation is a straightforward, quick, and cost-effective process, whether hiring a specialist or taking on a DIY project. However, before you start insulating your shed, it's essential to consider a few key factors:
- Inspect windows and doors: Ensure your shed's windows and doors are in good condition. Damaged or draughty areas will reduce the effectiveness of your insulation, so repair or replace them if necessary.
- Check for roof leaks: Inspect the shed roof for any leaks. Dampness can significantly reduce insulation efficiency and increase the risk of mould and mildew growth, potentially damaging the shed's structure and contents.
- Seal gaps in cladding: Look for gaps in the shed's cladding, as these can cause moisture and draught problems. Use a moisture-resistant and weatherproof sealant to make the cladding airtight, improving insulation effectiveness.
- Consider the shed's purpose: If you're insulating the shed for a home office or cosy garden space, consider installing a breather membrane between the shed walls and insulation to manage moisture. This is crucial if no other ventilation (e.g., a roof vent) exists. Without a breather membrane, moisture from everyday activities can accumulate, leading to dampness and condensation issues.
- Understand your shed material: Wooden sheds are easier to insulate due to their built-in framing, which creates natural gaps for insulation and improves thermal efficiency. On the other hand, metal sheds have smooth, flat surfaces without framing, making it more challenging to install insulation and create an air gap.
By addressing these factors, you'll ensure that your shed insulation is effective and long-lasting, making your shed a comfortable and functional space year-round. Below, we go into a step by step guide on how to insulate your shed.
1. Choose an insulation material
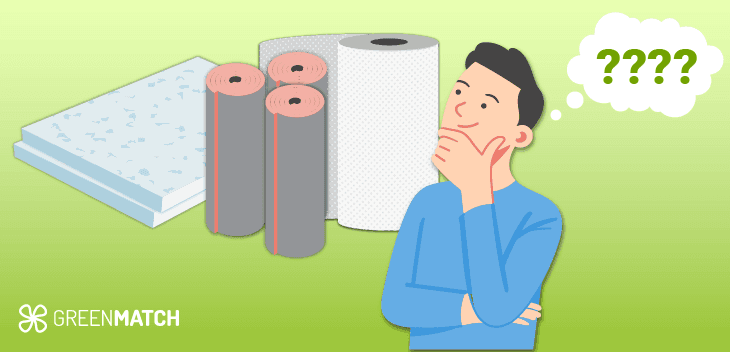
Before insulating your shed, gather all the necessary materials. You can purchase or create an insulation kit, typically including a vapour barrier, measuring tape, staple gun, and safety gear. An insulation kit is convenient, as it contains most essentials needed for shed insulation.
Once you have your materials, select an insulation option based on your budget, the area to insulate, and the shed's purpose:
- Fibreglass: A cost-effective, easy-to-install thermal insulator. However, it can retain moisture, causing mould growth, and requires protective gear to avoid skin irritation.
- Spray foam: Offers superior thermal efficiency and expands to create an airtight, moisture-resistant seal. It's a premium option but requires professional installation, making it unsuitable for DIY projects or smaller budgets.
- Rigid foam boards: Provide excellent thermal efficiency and moisture resistance. Available in XPS, EPS, and PIR, they vary in R-values and cost. Durable yet more expensive, they require precise cutting for a snug fit.
- Blown-in cellulose: An eco-friendly option made from recycled paper, reaching hard-to-access areas. However, it can sag with moisture and needs specialised equipment, making it less DIY-friendly.
- Bubble wrap: A simple, cost-effective solution that traps heat in air bubbles. Foil-backed versions offer better insulation, but it lacks the thermal efficiency needed for sheds used as work or living spaces.
- Mineral wool: Provides excellent thermal efficiency, fire resistance up to 982°C, and moisture resistance. However, it's heavier than other options, which might cause structural issues if not installed correctly.
Choose the insulation material that aligns with your needs and budget, and consider professional installation for optimal results and efficiency.
2. Prepare your shed

Properly preparing your shed for insulation ensures effective and long-lasting results. Here's a detailed guide on how to get your shed ready for insulation:
- Clear out the shed: Start by removing all items from your shed to create a clutter-free workspace. This will give you easy access to all areas that need insulating and prevent damage to your belongings.
- Inspect for damage: Check the shed's structure for any signs of damage, such as cracks, holes, rotting wood, rust, or corrosion. Pay special attention to the roof, walls, and floor. Repair any damage to ensure a solid, airtight surface for the insulation.
- Seal gaps and cracks: Look for gaps, cracks, or holes in the walls, roof, and floor where air or moisture could enter. Use weatherproof sealant or caulk to fill these gaps, ensuring your shed is as airtight as possible before applying insulation. This step is crucial, as even small gaps can reduce insulation efficiency.
- Check windows and doors: Inspect windows and doors for drafts or damage. Replace any broken glass, worn-out seals, or weatherstripping to prevent heat loss. A properly sealed door and window frame will enhance the insulation's effectiveness.
- Clean the interior: Before starting insulation, thoroughly clean the interior surfaces, removing dust, dirt, and cobwebs. This helps insulation materials adhere better and ensures a smooth installation process.
By preparing your shed, you'll create the ideal environment for insulation, maximising its efficiency and ensuring a comfortable, protected space all year round.
3. Insulate the walls
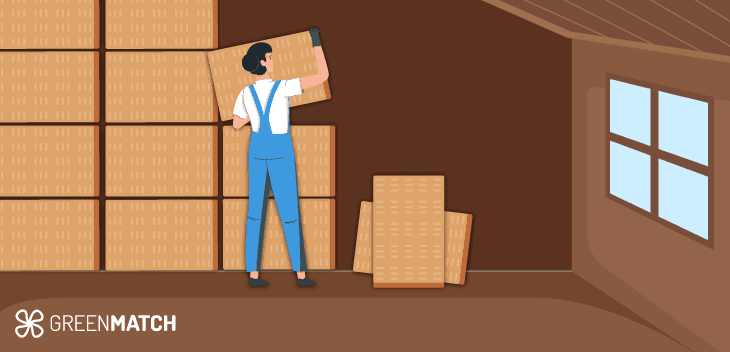
Insulating your shed walls is the most effective way to enhance thermal comfort, as walls lose more heat than any other part. Here's how to do it:
- Measure the space between the studs: Measure the distance between the studs (vertical framing) inside your shed walls. This ensures your insulation fits snugly.
- Install a vapour barrier: Fit a vapour barrier between the studs to prevent moisture from entering the insulation, reducing the risk of dampness, mould, and rot. Secure it with a staple gun or tape, ensuring complete coverage.
- Cut the insulation to size: Using a serrated knife (or a bread knife), cut your chosen insulation material (fibreglass batts, rigid foam boards, or mineral wool) according to your measurements. Accurate cuts ensure a proper fit.
- Install the insulation: Push the insulation firmly into place between the studs. Ensure it fits snugly but isn't compressed, as this maintains its thermal efficiency. Leave a 25mm gap between the surface and the insulation material to allow for proper ventilation.
- Apply adhesive (for metal or plastic sheds): If your shed is metal or plastic, apply adhesive to the walls before attaching the insulation to help it stick, as these surfaces can be slippery.
- Finish with plasterboard: Cover the insulated walls with plasterboard for a professional look. Secure it to the studs with screws, providing a clean, finished appearance while protecting the insulation.
By following these steps, you'll effectively insulate your shed walls, making your shed more energy-efficient and comfortable year-round.
4. Insulate the roof
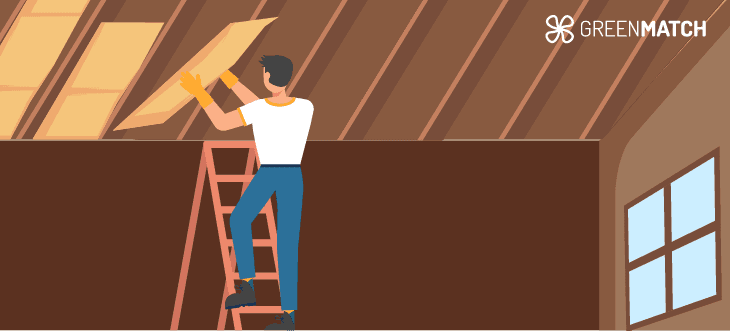
Insulating your shed roof effectively maintains temperature control and protects against moisture, ensuring year-round comfort. Follow these steps for proper shed insulation:
- Measure the space between the studs: Begin by measuring the distance between the roof studs (the framing structure) to ensure you cut your insulation to the correct size for a snug fit.
- Fit a vapour barrier: Install a damp-proof membrane over the roof studs to prevent moisture buildup, which can lead to mould and rot. Secure the membrane with a staple gun or tape, ensuring it covers the entire area.
- Cut the insulation to size: Cut your insulation material (such as fibreglass batts, foam boards, or mineral wool) to fit between the studs, allowing for a 2-inch gap around the edge of the ceiling. This gap helps moisture escape and prevents condensation issues.
- Install the insulation: Push the insulation between the studs, ensuring it fits snugly without being compressed, as this maintains its thermal efficiency. Make sure the insulation sits flush with the roof's surface. Leave a gap of about 50 mm between the material and the surface for ventilation.
- Use adhesive for metal or plastic sheds: If your shed is made of metal or plastic, apply glue to the roof before fitting the insulation. This ensures the material sticks firmly, as these surfaces can be slippery.
- Finish with plasterboard: Cover the insulated roof with plasterboard for a clean, professional look. Attach it using screws, giving your shed interior an attractive appearance while protecting the insulation.
By properly insulating your shed roof, you'll enhance the overall shed insulation, making your shed more energy-efficient, reducing heat loss, and protecting it from moisture damage throughout the year.
5. Insulate the floors
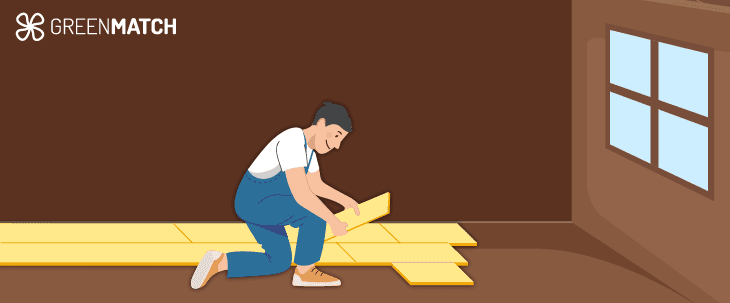
Insulating your shed floor is an effective way to minimise heat loss and enhance overall shed insulation. Remember that this process will slightly reduce the shed's internal height, but it's a worthwhile trade-off for increased comfort. Here's how to insulate your shed floor:
- Lay the insulation board: Start by placing insulation boards directly over the shed floor. Common options include rigid foam boards, which provide excellent thermal efficiency and moisture resistance. Ensure the boards cover the entire floor surface without leaving any gaps, maximising the insulation's effectiveness.
- Add a plywood layer: Once the insulation boards are in place, top them off with a layer of plywood. This step stabilises the floor, protects the insulation from damage, and creates a sturdy, level surface. Secure the plywood to the floor using screws, ensuring it's firmly attached.
- Seal any gaps: Finally, use a weatherproof sealant to fill any gaps around the edges of the floor or where the plywood meets the shed walls. This step helps prevent drafts, moisture, and pests from entering, ensuring your shed insulation is as effective as possible.
Following these steps, you'll create an insulated shed floor that reduces heat loss, keeps the shed warmer, and makes the space more energy-efficient and comfortable, especially during colder months.
6. Insulate the doors and windows

Properly insulating shed doors and windows is essential for reducing heat loss and improving overall shed insulation. These areas are often the main sources of drafts, so insulating them can make a significant difference. Here's how to do it effectively:
- Insulate the shed doors.
- Add weatherstripping: Start by applying weatherstripping around the edges of the door frame. This creates a tight seal, preventing cold and warm air from escaping. Choose adhesive-backed weatherstripping for an easy installation.
- Install insulation panels: For better insulation, cut rigid foam boards or reflective insulation to fit the door's interior. Attach them with adhesive or screws, ensuring they cover the entire door surface. This step benefits thin, wooden, or metal doors that lack insulation.
- Use a draft excluder: Place a draft excluder along the bottom of the door to block any gaps where cold air might enter. You can use a store-bought version or make your own using fabric and foam.
2. Insulate the shed windows.
- Apply window insulation film: Window insulation film is an easy and cost-effective way to reduce heat loss. Apply the film to the window glass, using a hairdryer to shrink it for a tight fit. This creates an additional barrier against drafts.
- Install window inserts: If you want more effective insulation, consider adding acrylic or polycarbonate window inserts. These panels fit snugly inside the window frame and add an extra insulation layer.
- Seal gaps with caulking: Inspect the window frames for any gaps or cracks. Use caulking to seal these areas, preventing drafts and moisture from entering.
Properly insulating your shed doors and windows will significantly improve your shed insulation, keeping the space warmer, reducing energy loss, and enhancing comfort throughout the year.
7. Inspection and final checks

After installing insulation in your shed, a thorough inspection is crucial to ensure everything fits correctly and effectively. Here’s a final checklist to guide you:
- Check for gaps and air leaks: Walk around the shed and inspect all insulated areas, including walls, roof, floor, doors, and windows. Look for gaps, cracks, or areas without snugly fitted insulation. Even small gaps can reduce shed insulation efficiency by allowing drafts. Seal gaps with caulking, weatherstripping, or foil tape to ensure an airtight finish.
- Inspect the vapour barrier: Ensure the vapour barrier is fully intact and securely attached. This barrier is essential for preventing moisture from penetrating the insulation and causing mould or dampness. Check for tears or loose edges and repair them with tape or additional stapling.
- Check insulation panel stability: Verify that all panels are firmly in place, especially on the roof and walls. There should be no sagging or movement, as this compromises insulation effectiveness. For rigid foam boards, make sure they’re securely attached with adhesive, screws, or staples.
- Inspect windows and doors: Test them to ensure they open and close smoothly after insulation. Confirm that weatherstripping and draft excluders are correctly fitted and effectively seal any gaps.
- Monitor for moisture buildup: After a few days, inspect the shed for signs of condensation or moisture, particularly in corners and along the roof. Any moisture could indicate insulation or ventilation issues that need addressing.
If you're unsure about any part of the process or aim for guaranteed results, it's crucial to explore professional help. Insulation installers can deliver a top-notch job, enhancing the efficiency and lifespan of your shed insulation. GreenMatch is your gateway to connecting with the best insulation installers in your area. Fill out our quick 30-second form, and you can receive up to four free quotes. Click below to discover more!
- Describe your needs
- Get free quotes
- Choose the best offer
It only takes 30 seconds


How to insulate a shed for free

Insulating your shed doesn't have to be costly; you can do it for free using recycled or repurposed materials you already have at home. Here's how you can insulate your shed without spending a penny:
- Old blankets, towels, or curtains: These household items can provide insulation, trapping heat inside your shed. Hang them over the walls, ceiling, or doors using nails, tacks, or string. Although they aren't as effective as commercial insulation, they offer some warmth and help reduce drafts.
- Cardboard boxes: Collect old cardboard boxes from deliveries or local stores. Flatten and cut the cardboard to fit your shed's walls, roof, and floor. Cardboard provides a decent insulating layer against cold air. Secure it with a staple gun, nails, or tape, and use multiple layers for better insulation.
- Bubble wrap: If you have leftover bubble wrap from packaging, it can be a surprisingly effective insulator. Attach it to the shed's walls and roof with the bubbles facing inward to trap air. This works particularly well for windows, helping to reduce heat loss.
- Leftover insulation materials: Use any leftover insulation materials from previous projects to insulate your shed. Extra fibreglass batts, foam boards, or bubble wrap can be repurposed to cover the shed's walls, roof, or floor. This reduces waste and improves insulation, making your shed more energy-efficient and comfortable.
While grants for free insulation are available for households to reduce energy bills and carbon footprints, they typically don't cover sheds. However, you can contact your local authority to inquire about potential funding schemes that may help offset some of the costs for shed insulation. This approach could assist in making your shed more energy-efficient without a large investment.
Best shed insulation

Choosing the right material used for insulation depends on your budget, sustainability concerns, DIY skills, and insulation needs. Here’s a quick guide to the best options:
- Cost-effective: Fibreglass batts are an excellent option for cheap shed insulation. They provide good thermal efficiency and fit easily between wall studs. While effective, you’ll need protective gear during installation due to the fibres being an irritant.
- Sustainable: Cellulose is an excellent choice for sustainable shed insulation. It is made from recycled paper and offers effective thermal efficiency. It’s eco-friendly, non-toxic, and provides good coverage, making it ideal for environmentally conscious insulation projects.
- Best for DIY: Bubble wrap is ideal for DIY projects due to its simplicity and ease of installation. It’s lightweight, flexible, and easy to cut, making it suitable for sheds with irregular shapes. While not as thermally efficient as other materials, it provides a basic insulation layer and reduces drafts.
- Most thermally efficient: Spray foam is the most thermally efficient option, offering superior heat retention and an airtight seal. It expands to fill gaps, effectively preventing air leaks and moisture. However, it’s more expensive and typically requires professional installation.
- Overall best: Rigid foam boards are the best choice, combining cost-effectiveness, high thermal efficiency, and ease of installation. They are durable, moisture-resistant, and suitable for walls, floors, and roofs. Available in types like XPS, EPS, and PIR, they can be cut to fit any space, making them versatile and ideal for most shed insulation projects.
Shed insulation cost
The cost of shed insulation depends on factors such as the shed's size, the insulation materials used, and whether you choose to DIY or hire a professional. Here's a breakdown of average insulation costs based on standard shed sizes:
| Shed size | Cost |
|---|---|
| 8 x 8 | £670 |
| 10 x 10 | £1005 |
| 16 x 12 | £1600 |
The above estimates are based on foil-backed insulation. Insulation prices will increase if you opt for premium materials like spray foam, which averages around £62.50 per m2 (depending on whether you choose open or closed-cell foam). Conversely, cheaper materials like fibreglass cost around £10 per m2. Here are the costs of shed insulation materials:
| Material | Average cost per m2 |
|---|---|
| Fibreglass | £10 |
| Bubblewrap | £10 |
| Polystyrene (EPS) board | £10 |
| Cellulose | £11 |
| Polyisocyanurate (PIR) board | £12.50 |
| Polyurethane (XPS) board | £21.50 |
| Mineral wool | £13 - 17.50 |
| Spray foam | £21.50 or more |
Additionally, choosing a professional installation versus a DIY approach will significantly impact overall expenses. Labour typically accounts for 60-80% of the total cost, with insulation installers charging about £250 per person daily. While shed insulation usually takes only a day, opting for DIY can be a more cost-effective solution.
How can you insulate your shed cheaply?
Insulating your shed on a budget is possible using cost-effective materials and DIY methods. Here's how you can achieve cheap shed insulation without compromising on effectiveness:
- Use fibreglass batts: Fibreglass batts are one of the most affordable insulation materials, offering good thermal efficiency. They're easy to cut and fit between wall studs, making them popular for insulating on a budget.
- Bubble wrap insulation: Bubble wrap is a simple and inexpensive option for shed insulation. You can buy it in rolls or reuse leftover packaging. Staple or tape it to the walls, roof, and windows, ensuring the bubbles face inward to trap heat. Although not as effective as other materials, it provides a basic insulation layer that reduces drafts.
- Use recycled materials: Repurpose old blankets, towels, curtains, or even cardboard as insulation for your shed. These items can be attached to the shed's interior walls, roof, or doors, offering warmth and draft reduction at no extra cost. Additionally, using recycled materials can help you create a more sustainable shed.
- DIY installation: Opting for a DIY approach instead of hiring professionals will save you high labour costs.
Using these methods and materials, you can achieve effective shed insulation without overspending, keeping your shed warmer and more comfortable throughout the year.
Pros and cons of shed insulation
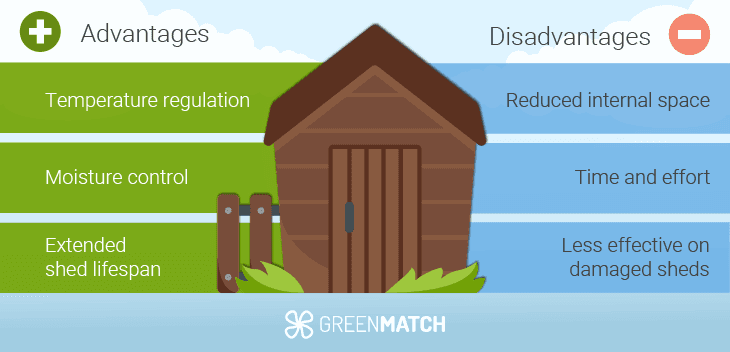
It's essential to weigh the pros and cons of shed insulation to make an informed decision. This process helps you evaluate the benefits, costs, and potential challenges, ensuring the investment aligns with your budget, needs, and how you plan to use the shed.
Pros
- Temperature regulation: Shed insulation helps maintain a stable temperature, keeping it warm in winter and cool in summer, making it comfortable for year-round use, mainly if you use the shed as a workshop, home office, or hobby space.
- Moisture control: Insulation reduces condensation, preventing dampness, mould, and mildew, which can damage both the shed's structure and the items stored inside.
- Extended shed lifespan: By reducing moisture and temperature fluctuations, insulation helps protect the shed's materials, preventing rot and corrosion, which extends its lifespan.
- Increased versatility: An insulated shed can be transformed into a more functional space, such as a home office, gym, or guest room, enhancing your property's overall value and usability.
Cons
- Reduced internal space: Insulating materials can take up some space inside the shed, slightly decreasing the available floor area, which might concern smaller sheds.
- Time and effort: Insulating a shed, especially if you opt for a DIY project, can be time-consuming and requires effort, particularly for larger sheds.
- Potential maintenance: Insulation can deteriorate over time, especially in sheds prone to moisture. You might need to inspect and replace insulation materials periodically to maintain their effectiveness.
- Less effective on damaged sheds: If your shed has structural issues or significant gaps, insulation may be less effective until those issues are fixed, increasing the overall cost.
Is shed insulation a good option for you?
Insulation for sheds can be a wise investment, especially if you want to create a comfortable, energy-efficient, and weather-resistant space. It's an excellent choice if you use your shed as a workshop, home office, or storage for valuable items, as insulation helps regulate temperature, reduces moisture, and extends the shed's lifespan. Additionally, it makes the shed more versatile, allowing you to use it year-round.
However, shed insulation can be challenging, particularly if you're unsure about the suitable materials or installation methods. Incorrect insulation can lead to inefficiency, moisture problems, or wasted effort. That's why working with a professional is often the best way to ensure your shed insulation is done correctly and effectively.
GreenMatch can connect you with the right insulation specialists to make the process easier. By filling out our simple 30-second form, you'll receive up to four free quotes from your area's best local insulation installers. This ensures you get expert advice and the most cost-effective solution for your shed insulation needs. Click below to learn more.
- Describe your needs
- Get free quotes
- Choose the best offer
It only takes 30 seconds


FAQ
Yes, insulating a shed significantly improves temperature regulation, moisture control, and energy efficiency, making it more comfortable and versatile for year-round use.
Yes, insulating a shed helps reduce dampness by regulating temperature and preventing condensation, especially when paired with a vapour barrier.
The best insulation for a shed is rigid foam boards, as they offer excellent thermal efficiency, moisture resistance, and are easy to install. However, the best insulation material may differ depending on your goals such as budget, sustainability or thermal efficiency.
You can insulate your shed cheaply by using cost-effective materials like fibreglass batts, bubble wrap, or repurposing recycled materials.
Yes, you should leave an air gap when insulating a shed wall or ceiling to improve ventilation and prevent moisture build up.

Caoimhe is an experienced content writer and researcher who is passionate about providing accessible information to every reader. With a background in English literature and Sociology, she combines the two disciplines to create cohesive, well-thought-out, and well-informed pieces.
We strive to connect our customers with the right product and supplier. Would you like to be part of GreenMatch?

