Answer these simple questions and we will find you the BEST prices
Which type of solar quotes do you need?

Get Free quotes from insulation specialists near you

Save money by comparing quotes and choosing the most competitive offer

The service is 100% free and with no obligation
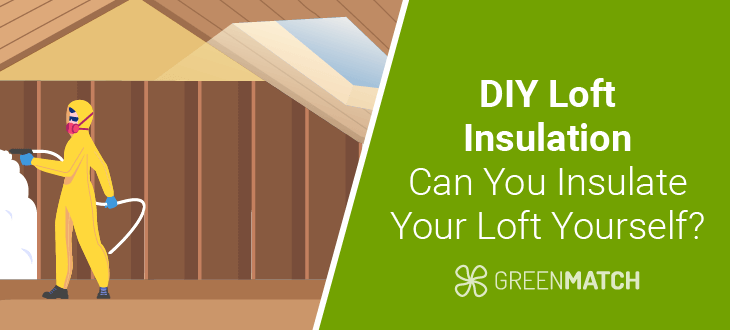
DIY Loft Insulation: Can You Insulate Your Loft Yourself?

- In the UK, 70.23% of households lack sufficient insulation, making them vulnerable to increasing energy costs.
- DIY loft insulation can result in significant cost savings, with labour alone often averaging £250 per person per day.
- Improper installation, moisture control issues, and the complexity of certain roof types pose significant risks for DIY loft insulation. If not handled correctly, these challenges could result in expensive repairs.
- UK government grants are unavailable for DIY insulation projects; only certified professionals qualify for grants.
With an estimated 70.23% of homes in the UK having little to no insulation, many households are increasingly vulnerable to rising energy costs. In fact, one in four people report struggling to pay their electricity bills, highlighting the growing burden of the high cost of living.
As energy prices continue to soar, insulating your home has never been more essential. One of the most effective ways to reduce energy costs and lower your carbon footprint is through loft insulation. Since heat naturally rises, uninsulated lofts can lead to significant energy loss—up to 25% of your home’s heat can escape through the roof.
While insulation for lofts can be costly, ranging between £730 to £1,700 depending on factors like property type, materials used, and location, a significant portion of the cost is labour. This has led many homeowners to explore DIY loft insulation as a cost-saving alternative.
In this guide, we'll explore whether insulating your loft yourself is a feasible option, what the process entails, and how you can achieve the best results while minimising expenses and ensuring your home stays warm and energy-efficient.
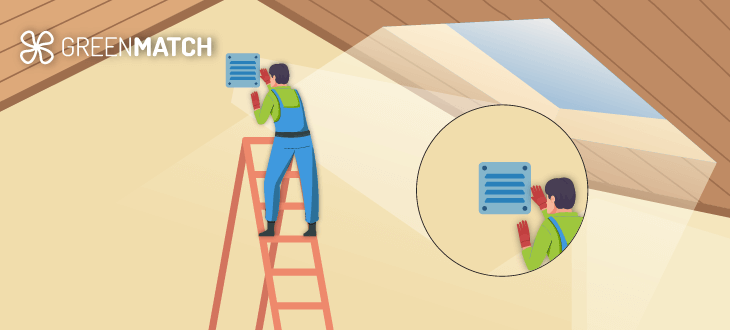
For any DIY insulation project, the smartest move you can make is to consult with at least one insulation specialist. Their expertise can guide you through the process, helping you avoid mistakes that could lead to costly repairs down the road.
If you're looking to save both time and money, GreenMatch has a solution for you. Simply fill out our quick 30-second form, and we'll connect you with four free quotes from top insulation specialists—no hidden fees, no obligations. Click below to discover how we can help you make your project a success.
Is DIY loft insulation possible?

DIY loft insulation is possible and can significantly reduce labour costs, averaging around £250 per person per day. However, when considering DIY loft insulation, weighing the potential cost savings against the risks of improper installation is essential.
While opting for DIY can reduce labour costs, several critical factors must be considered before tackling the project yourself:
- Roof type: Different roof structures require specific insulation methods and materials; for example, flat roofs demand different techniques than pitched roofs, making them more challenging for a DIY project.
- Installation method: Consider whether your loft needs cold loft insulation, which is ideal for storage-only spaces, or warm loft insulation, which is better suited for living areas. Cold loft insulation is generally more DIY-friendly, while warm loft insulation may require professional help.
- Insulation material: Choose insulation materials that are easy to handle and install and always prioritise safety. More advanced materials like spray foam insulation are better suited for professional installation, as they require specialised tools and expertise.
- Loft accessibility: If your loft space is cramped or difficult to navigate, DIY installation could be challenging and hazardous.
- Moisture control: Improper installation may cause moisture buildup, leading to mould growth and structural damage. It's crucial to maintain adequate ventilation and avoid obstructing vents or eaves.
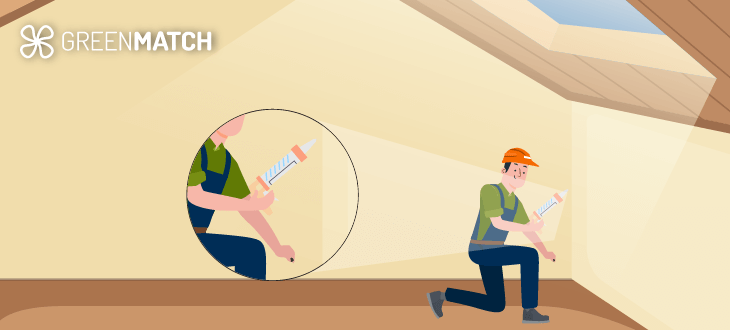
- Safety precautions: Wear protective clothing when handling abrasive materials like fibreglass. Additionally, ensure that if the material you are working with is flammable, it should not be installed near any electrical points, as this can lead to a fire.
- Building regulations: Before starting your DIY loft insulation project, ensure it complies with local building regulations. Improper insulation can affect your home's energy performance certificate (EPC) rating and cause issues if you decide to sell.
DIY loft insulation can save money, but certain aspects like complex roof types, specialised materials, and compliance with building regulations often require professional assistance. Professionals ensure proper installation and legal compliance, safeguarding your home's structure and energy efficiency.
Pros and cons of DIY loft insulation
When considering DIY loft insulation, it is crucial to weigh the pros and cons to ensure you can make an informed decision that balances cost savings with potential risks. DIY insulation can significantly reduce costs, especially by avoiding labour expenses. Still, it also comes with challenges that could undermine the benefits if not properly addressed. Below, we will go into further detail on the pros and cons of DIY loft insulation.
Pros
- Cost savings: One of the main benefits of DIY loft insulation is the potential to save on labour costs, which can be substantial. By doing the project yourself, you can avoid paying the typical £250 per person per day for professional installation, thus reducing the project's overall cost.
- Flexibility: Doing your loft insulation allows you to work at your own pace and schedule. You can decide when and how fast you want to finish the project, which can be especially helpful if you need to spread the work out over several weekends.
- Personal satisfaction: Insulating your loft can provide a sense of accomplishment and boost your DIY skills.
Cons
- Risk of improper installation: One of the most significant drawbacks of DIY loft insulation is the risk of improper installation. Mistakes, such as leaving gaps, compressing the insulation, or blocking ventilation, can reduce the effectiveness of the insulation and lead to issues like moisture buildup, mould, and structural damage. This can eventually lead to higher long-term costs on repairs.
- Not suitable for certain materials: Some materials, such as spray foam, blow-in cellulose, and blown-in fibreglass, require specialised equipment for installation, which DIYers may not have access to.
- Safety concerns: Insulating materials, particularly fiberglass, can cause skin irritation and respiratory problems if mishandled. Additionally, working in cramped or poorly ventilated spaces can pose risks. Homeowners may ask, is loft insulation dangerous? While loft insulation is generally safe when installed correctly, it is important to take proper precautions to mitigate these health risks.
- Not suitable for certain roof types: While cold loft insulation (insulating between the joists) is relatively straightforward, other types of insulation, like warm roof insulation (insulating between and over the rafters), can be complex and require precise installation techniques. Flat roofs, mainly, can only be insulated properly with professional expertise.
- Time-consuming: DIY loft insulation can be time-consuming, especially if you’re unfamiliar with the process. What might take professionals a day could stretch out over several weekends, depending on the scope of the project and your availability.
DIY loft insulation offers significant cost savings and flexibility, making it an attractive option for many homeowners. However, the risks of improper installation, safety concerns, and the complexity of certain roof types should not be overlooked.
It can be a rewarding project for those confident in their DIY abilities and with straightforward lofts. However, hiring a professional might be the wiser choice for more complex situations or for those uncertain about the process to ensure the job is done correctly and safely.
How to do DIY loft insulation
Understanding how to do DIY loft insulation before starting your project is essential. Failing to do so can result in improper insulation, making it less thermally effective and potentially causing moisture buildup and structural damage. Below are the crucial steps for DIY loft insulation.
Prepare the loft space
Preparing your loft space for insulation installation is crucial to ensure the process goes smoothly and the insulation performs effectively. Here's a guide on how to get your loft ready:
Removing old insulation
If your loft has insufficient insulation, it should be removed before installing new insulation. However, if your loft already has high-quality insulation, you can leave it in. Measuring the depth of the existing material is essential to ensure you buy the right amount of additional insulation. In the UK, the recommended insulation thickness is 270mm. Therefore, checking the current depth will help you avoid purchasing too much insulation.
Clear the space
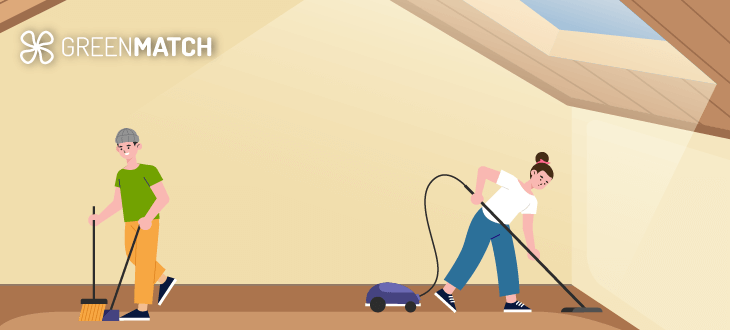
After checking the existing insulation in your loft, you should clear out your attic space. This will provide you with plenty of working space and prevent damage to your belongings during the insulation installation. It's also a good idea to clean and vacuum the area, as dust and debris can interfere with the DIY loft insulation process.
Check for existing issues
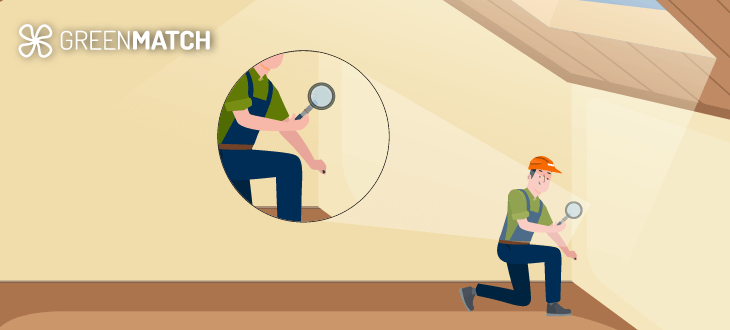
Check for signs of moisture, such as water stains, mould, or mildew. If you notice any damp areas, address these problems before proceeding with insulation. Moisture can reduce the effectiveness of the insulation and lead to further issues.
Additionally, look for signs of pests, such as droppings or nests. If you find any infestations, it's crucial to address them before installing insulation, as pests can cause damage to the insulation materials.
Ensure proper ventilation
Good ventilation is crucial when preparing your loft for insulation. This helps prevent moisture build-up, which can lead to the growth of mould and mildew. Ensure that vents, soffits, and eaves are clear and unobstructed. Proper airflow will help maintain the insulation's effectiveness and protect your home's structure.
Check for wires and pipes

Before starting your DIY loft insulation project, it's essential to check for pipes and wires in your attic. Insulate any exposed pipes with pipe insulation and provide insulation jackets for water tanks to optimise thermal efficiency.
It's crucial to identify and mark the location of electrical wiring. Secure the wires by clipping them to the roof joists during installation. This will prevent damage during installation and ensure that cables remain easily accessible for future maintenance.
Check for asbestos
According to Armco, homes built between the 1930s and the 1980s may contain asbestos in pre-existing insulation. If you suspect asbestos in your home, do not disturb it and seek professional assistance immediately.
Plan the layout
Measure your space to determine how much loft insulation material you'll need. Planning the layout will help you cut the insulation to the correct size and avoid wastage.
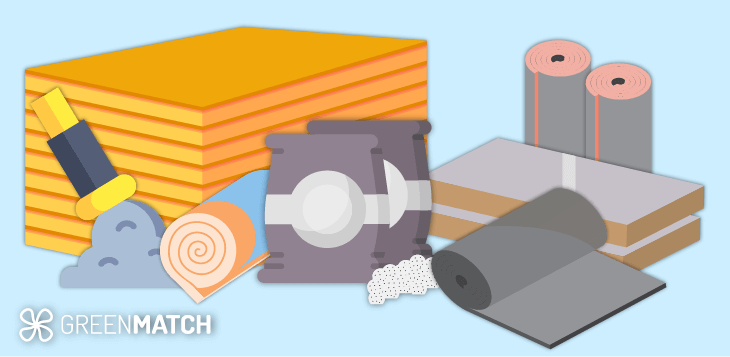
Selecting the right material
Before starting your DIY loft insulation project, choosing the insulation material that best fits your needs and budget is essential. The best loft insulation material in the UK depends on your preference, whether you are opting for a more sustainable choice to reduce your carbon footprint, a budget-conscious choice or one with the highest R-value.
The R-value measures thermal resistance and evaluates insulation materials' effectiveness in building and construction. Simply, it indicates how well an insulation material resists heat flow. The R-value insulation chart ranges from around 1.5 to 7, with 7 being the highest thermal efficiency.
Other factors to consider include ease of installation, non-flammability, and moisture resistance. Each type of insulation has its advantages and disadvantages. Here are the available insulation materials suitable for DIY loft insulation.
Fibreglass
Fibreglass is the cheapest insulation material available at £10 per m2, which makes it a popular choice for budget-conscious people. It is also a great choice for DIY projects as it is lightweight and comes in rolls or batts, making it easy to install.
Fibreglass has an R-value of 3 to 4 per inch. It is non-flammable, giving you peace of mind when installing this material in tricky locations in your attic with electrical points nearby.
However, the downside of choosing fibreglass insulation is that it requires protective gear when handled. Tiny glass fibres in fibreglass can irritate the skin and harm the respiratory system if inhaled without a mask. Additionally, fibreglass is not moisture-resistant and can lead to the growth of mould and mildew if it becomes damp.
Mineral wool
Mineral wool, also known as rock wool, is popular for DIYers because it comes in convenient batts and rolls, making it easy to install in your loft space. People highly regard it for providing excellent thermal and acoustic insulation, preventing heat loss, and reducing noise pollution in your home.
With an R-value ranging between 3.7 and 4.3 per inch, mineral wool is effective at insulating your home. It is also fire and moisture-resistant, offering peace of mind once installed. However, handling mineral wool requires protective gear, like fibreglass, as it can irritate the skin and respiratory system.
Its heavy weight can also make installation more challenging despite its convenient form. Another consideration is the cost; at approximately £18.20 per m2, mineral wool is on the higher end of the price scale, which might not be ideal for those seeking a more budget-friendly insulation option.
Polystyrene rigid foam boards
Polystyrene foam boards are available in two forms: expanded (EPS) and extruded (XPS). Both are durable, lightweight, and easy to install.
EPS, with an R-value of 4 to 4.5 per inch, is cost-effective at around £10 per m2. However, its flammability and potential to release toxic fumes at high temperatures make it unsuitable for particular cladding and roofing materials, limiting its use. Additionally, experts do not recommend EPS for cold roof insulation due to the significant risks of installing it near electrical points.
On the other hand, XPS offers the highest R-value for DIY loft insulation, ranging from 5 to 6 per inch. It is exceptionally strong and water-resistant, helping to prevent mould and mildew growth. However, it comes at a higher cost of £21.50 per m2 and, like EPS, is flammable, which requires careful consideration depending on the application.
Sheep wool
Sheep wool is an excellent material for DIY loft insulation, especially for those looking to reduce their carbon footprint. It is biodegradable and renewable, offering a sustainable insulation option.
Sheep wool is naturally water and fire-resistant and provides an R-value of 3.5 to 3.8 per inch. It's easy to install and doesn't require protective gear, making it user-friendly for DIY projects.
However, sheep wool has a higher price tag, costing around £19.75 per m2. Additionally, because it is an organic material, it can be susceptible to pests if not treated with pesticides before installation.
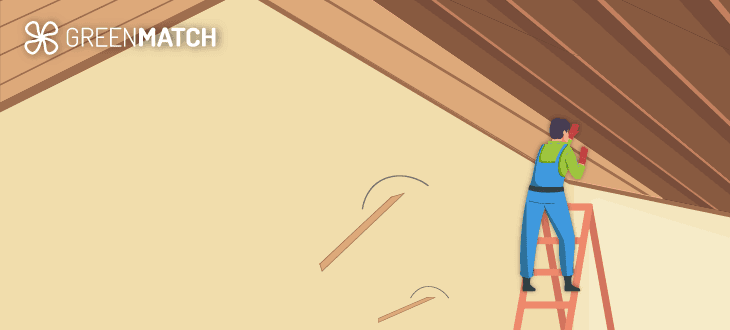
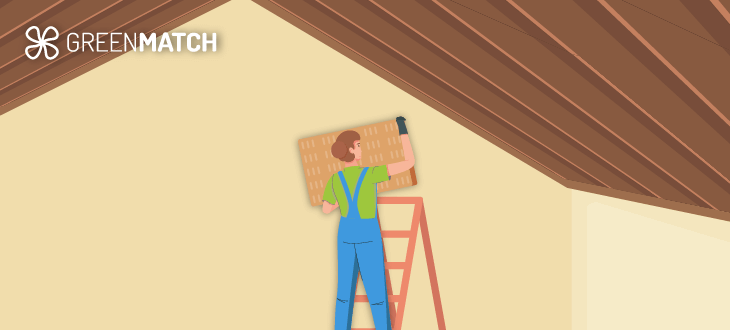
Install the insulation
After preparing your loft space and selecting the best material, the next step is installing the insulation. Before beginning the DIY loft insulation installation process, ensure you have the right tools. These include:
- Tape measure
- Serrated knife to cut small pieces of insulation
- Panel saw to cut larger pieces of insulation.
- Downlight covers are optional but vital if you place your loft floor underneath insulation to insulate over lights installed within the ceiling below.
- Mask to protect yourself from dust particles and
- Protective gloves, specifically for highly irritating materials such as fibreglass or mineral wool
- A walk board, which balances over the joists of your attic, allows you space to work.
- Headlights will allow you to see clearly in darkly light attic spaces.
After you have gathered the right tools and selected materials, you can begin installing your insulation. Depending on whether you are choosing a cold insulation or warm insulation will affect the insulation process slightly.
Cold loft insulation
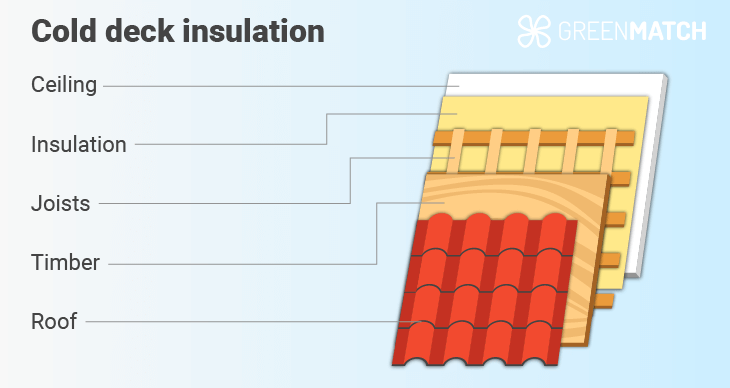
Laying insulation between the joists on your attic floor, also known as cold loft insulation, is one of the easiest ways to perform DIY loft insulation. Below are the steps for cold loft DIY insulation:
- Start laying insulation at the eaves, ensuring a 25mm gap for ventilation.
- Measure the width of the insulation material to fit between the joists. Typically, this falls between 400mm to 600mm.
- Use a knife to cut the insulation material to fit between the joists.
- Place the insulation throughout your loft space to fit snugly under the joists. Do not compress it, as this will reduce its thermal efficiency. When you reach a crossbeam, use a metal ruler and a serrated knife to cut off the excess insulation.
- To achieve the recommended thickness of 270mm, additional layers are placed on top of the first layer, perpendicular to the joists. This process helps to fill any gaps and enhance thermal efficiency.
Warm loft insulation
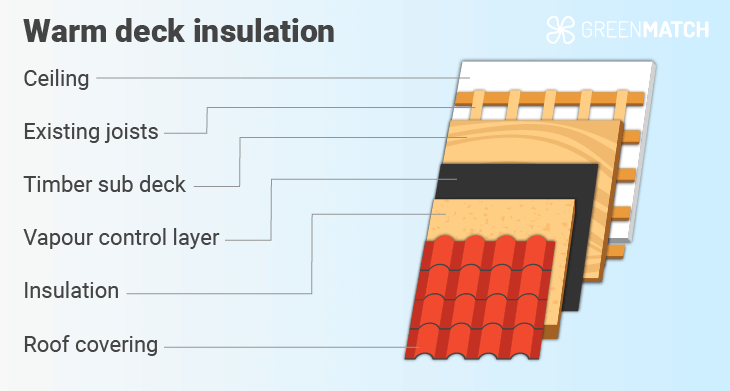
Warm loft insulation involves insulating the loft rafters. This insulation method typically creates a "warm loft," where the entire loft space, including the roof structure, is kept warm. This contrasts with "cold loft" insulation, where insulation is placed on the loft floor, keeping only the living spaces below warm while the loft remains cold.
Here are the steps for DIY loft insulation:
- Begin by insulating the joists in your loft space, similar to a cold loft insulation process. This step ensures that the living spaces below are adequately insulated.
- Choose rigid insulation boards such as XPS or EPS for the rafters. These materials are perfect for DIY loft insulation. They can be easily cut to size and ensure a tight fit without leaving gaps.
- Place the insulation panels or boards between the rafters, ensuring a snug fit without compressing the material to maintain its effectiveness.
- Securely fasten the panels using adhesive, nails, or staples, depending on the insulation material. Rigid foam boards can also be glued or secured with special insulation fixings to keep them in place.
- After securing the insulation, inspect the rafters for gaps or uneven areas. Ensure everything is fitted correctly and sealed to maintain the warm loft's thermal efficiency.
While it is possible to do it yourself, it is not recommended as it is more complex than cold loft insulation. This increases the likelihood of errors, which can lead to costly future repairs.
Hatch loft insulation

Hatch loft insulation is a great DIY option for loft insulation and is pretty straightforward. Here is how to insulate your loft hatch:
- Start by measuring the dimensions of your loft hatch to cut the insulation material to the correct size.
- Using a utility knife, cut the insulation material to fit the back of the hatch.
- Secure the insulation to the back of the hatch using adhesive or screws, ensuring it is firmly attached and covers the entire surface.
- To prevent drafts, apply weatherstripping around the edges of the loft hatch. When the hatch is closed, this will create an airtight seal.
- Inspect the installation to ensure no gaps or exposed areas allow heat to escape.
Check for gaps and cover
After successfully installing the insulation in your loft, carefully inspect the loft for any gaps or areas where the insulation isn’t snug. Fill any gaps with additional insulation or sealant. Additionally, depending on your chosen material, you may need to add a vapour barrier after installation to prevent moisture from condensing on the insulation.
Finish the loft
If you convert the loft into a living space, you can finish the insulation by covering the rafters with plasterboard. This will provide a neat finish and further insulate the space. If you need storage space, install a loft floor over the insulated rafters, ensuring that the insulation beneath remains uncompressed.
Inspect and maintain
After completing your DIY loft insulation, carefully inspect the entire loft to ensure everything is installed correctly without errors or gaps. Regularly check the insulation for any signs of damage, moisture, or pests and promptly address any issues to ensure its effectiveness.
Professional vs DIY loft insulation
While DIY loft insulation can be a cost-effective solution, there are several compelling reasons why hiring loft insulation specialists might be the better choice for your home.
- Specialised equipment: Professional installers use specialised equipment to apply insulation materials precisely, which is crucial for complex tasks like insulating hard-to-reach areas or applying materials like spray foam.
- Expertise and experience: Professionals with years of experience have the expertise to identify areas in your loft that may need extra attention. They can quickly spot potential issues, such as moisture problems.
- Safe handling of hazardous materials: Certain insulation materials, like mineral wool, can be dangerous if not handled correctly. Professionals are trained in safe handling procedures and use protective gear to minimise the risks of skin irritation or respiratory issues, ensuring a safe installation process.
- Warranty and peace of mind: Professional insulation companies offer a warranty on their work, ensuring that any post-installation issues will be addressed, saving you the hassle and potential costs.
- Compliance with regulations and access to grants: In the UK, loft insulation grants are only available when certified PAS 2030 – 2035 installers carry out the work. Since DIY loft insulation does not qualify for these grants, opting for a professional installation could save you money.
In deciding between professional and DIY loft insulation, it's crucial to consider your needs, budget, and comfort level with home improvement. Opting for professional installation offers unmatched expertise, specialised handling, specialised insulation access, and government grant eligibility.
Professional installers guarantee a superior insulation standard, ensuring your home remains warm and energy-efficient. At GreenMatch, we connect you with loft insulation specialists who customise their services to fit your budget and requirements. Fill out our 30-second form and we will provide you with four free quotes. No hidden costs, no obligations. Click below to find out more.
FAQ
We strive to connect our customers with the right product and supplier. Would you like to be part of GreenMatch?
